We independently research, review, and recommend the best products. If you buy something through our links, we may earn a commission. Learn more.
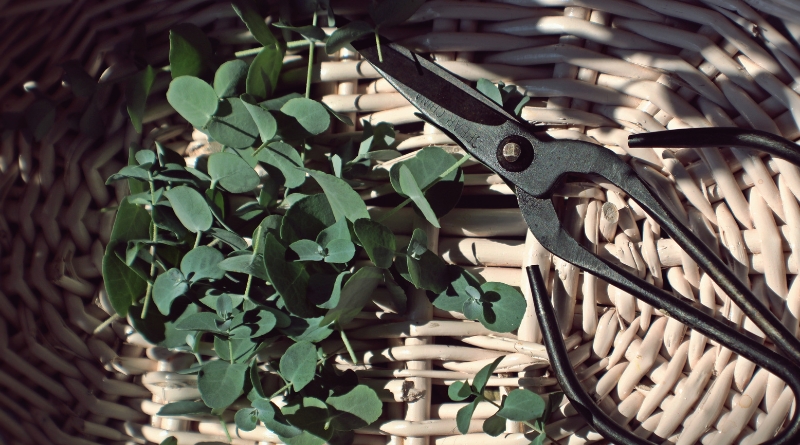
No gardener should underestimate the power of razor-sharp pruners. Like-new blades produce neat cuts that promote plant health, while dull pruners tear at organic tissue and spread disease—something you’ll want to avoid when working on your lovely outdoor space. Sharp tools also make your jobs much faster.
Chances are you already own a pair of pruners and need help with restoring them back to their former glory. In this case, keep reading to find an easy step-by-step guide to sharpening pruning blades, as well as information on the different tools you can use for the job.
Contents
Why do pruners need sharpening?
A well-pruned tree or shrub doesn’t just look great—it improves the health and vitality of our plants. But pruners become dull over time, and that’s when ragged cuts start to appear. The angles are never quite right, plants don’t heal properly, and your wrist begins to ache after a few squeezes. In short, dull is detrimental to your garden and body.
Therefore, to achieve the best results, you’ll want a sharp pruner that makes clean, precise cuts. Keeping the blades in good shape will give them more longevity, saving you money from having to find new replacements each growing season.
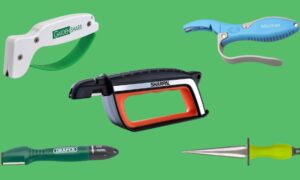
Tools to sharpen pruners
The great thing about sharpening garden pruners is that you can choose from a handful of different tools, many of which are inexpensive. Of course, there are advantages and disadvantages in each case, so I’ll give you my thoughts below:
Sharpening stone
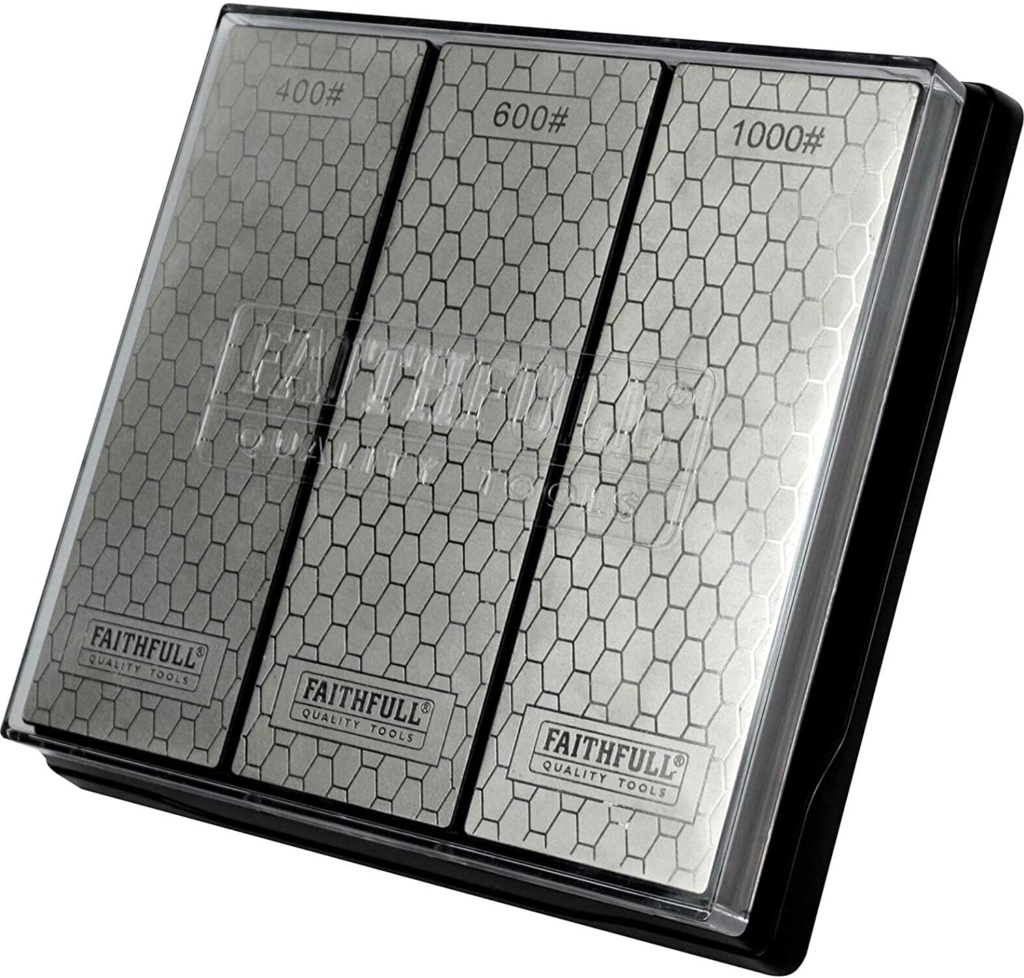
One of my favourite tools for restoring a set of pruners is a sharpening stone. As the name suggests, these are gritty objects that range from coarse to fine depending on how much friction your blades need. They come in different shapes and sizes, but also, the materials vary: some are natural oil and water stones, while others are made from synthetic substances, such as ‘diamond’ and ‘ceramic.’ They’re typically inexpensive, but you will need a fair bit of skill to remove metal from the blade fluidly. So, it’s perhaps one to avoid if you’re just starting out.
Diamond impregnated rods
As the name suggests, these pruner sharpeners feature diamond particles embedded in a metal rod. They’re a go-to tool for many professional gardeners because the rods are robust, durable and last the distance without losing effectiveness. The only downside is that they’re slightly more expensive than a sharpening stone, but they’re also easier to use and last longer.
Jeweler’s files
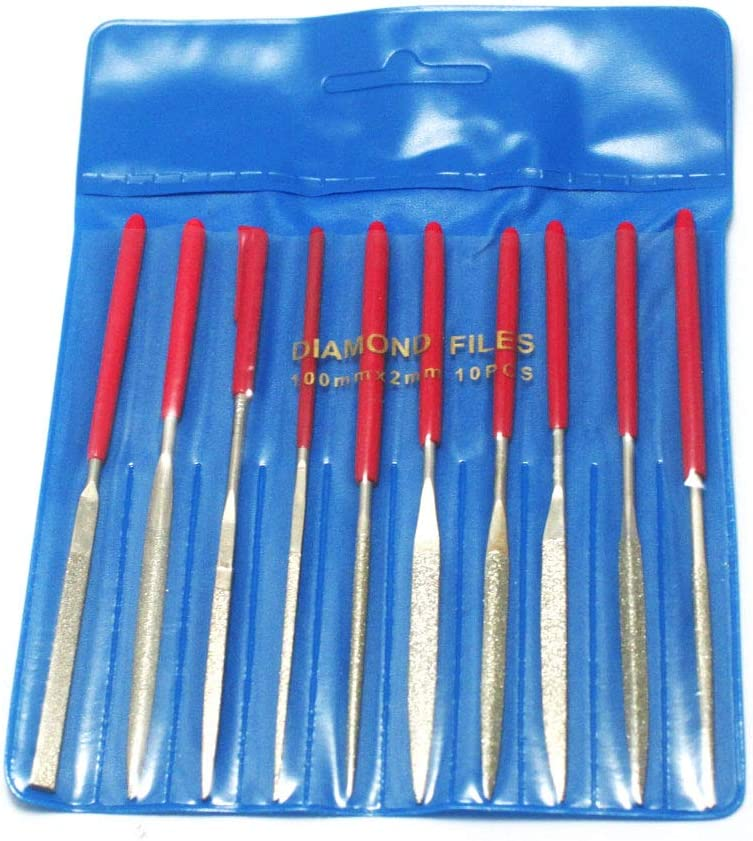
Jeweler’s files are like diamond impregnated rods in that they’re easy to use and quickly remove nicks from the blade. One thing to note, however, is that they can remove a lot of metal if used incorrectly, so you’ll need to watch a few tutorials to avoid rough edges. Jeweler’s files work on any small, delicate tools that need sharpening, so from a cost perspective, you’ll get more from this option.
Honing rods
Sometimes referred to as sharpening steel, honing rods don’t remove metal from the blade but instead realign the edge. They’re either made from ceramic, steel, or are diamond-coated—the latter much smoother to the touch. The fact that these tools feature the word “hone” tells you they’re used to straighten deformed edges rather than sharpen. For this reason, I wouldn’t use them to sharpen pruners; however, they could be useful when needing to reshape blades.
How to sharpen pruning blades
Depending on which tool you’ve chosen, sharpening hand pruners in decent condition shouldn’t take any longer than 10 minutes. As with most things, the more you do it, the faster you’ll get. I tend to sharpen my pruners every couple of months, but there’s no harm in doing it more regularly if you spend a decent amount of time in the garden. If you’re only using them a couple of hours a week, it’s ok to sharpen your pruners a couple of times a year.
My favourite tool for sharpening is a diamond impregnated rod, as I find them easier to use and a lot speedier than relying on a whetstone. So, here’s how I go about bringing blades back from the brink:
- First off, grab some gardening gloves—we’re dealing with sharp edges here, so stay safe. I like to then use warm, soapy water to give the pruners a good clean. It helps to remove any debris that might get in the way before applying the diamond rod. Finish by giving the pruners a dry with a clean rag or towel.
- Ready to sharpen? Start with the front side of the blade. Place the diamond rod at the same angle as the blade edge and, gently, run it from the base to the tip, following the curve. The key to great sharpening is slow and steady, checking for imperfections as you go.
- After several passes, check the blade for burrs (a thin ridge of metal created from sharpening). If you can feel any with your finger, place the blade flat and run the rod across it a few more times. Just make sure not to remove too much metal.
- Next, you’ll want to sharpen and deburr the counter blade aka the non-sharp one. You’ll want to follow the same line as in the first two steps, ensuring the blade angle is consistent. You may find it tricky to position the rod in tight areas, but just go slowly. As with step 3, check for burrs after every couple of passes and remove them where necessary.
- Once done, I like to give both blades a polish with fine steel wool. As always, go gently. For a greater finish, you may want to start with semi-coarse steel wool and then drop down.
Tips on maintaining pruner sharpness
Now your blades are in good shape, you’ll want to keep them that way. Here are a couple of tricks I use to keep my pruners cutting sharp:
- Clean the blades: After using your pruners, wipe down the blades with a wet cloth or a hard brush to remove any dirt or debris. Especially sap—this stuff tends to stick in the blades, which makes it harder to press.
- Oil the blades: After cleaning, apply a small amount of oil to the blades to prevent rust and keep them lubricated. I usually use a lightweight lubricant, such as mineral oil or WD-40.