We independently research, review, and recommend the best products. If you buy something through our links, we may earn a commission. Learn more.
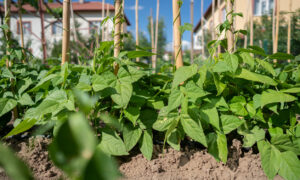
Tired of staring at a lifeless patch of grass? Growing a luscious lawn from seed is easier than you think. Sure, your local landscapers might say rolled turf is the only sensible option (kerching!), but really, it just comes down to preparation and patience. Go the scenic route and you’ll have the freedom to choose from a wide choice of grass mixes suited to different conditions.
So, start saving cash with this step-by-step method for growing grass. By the end of this guide, you’ll have a serious set of lawn skills and hopefully the confidence to transform your own outdoor space. Ready, steady…sow!
Contents
Seed or turf?

Seeding is definitely a budget-friendly option that offers the satisfaction of watching your lawn come to life from scratch—but, it does require a lot more patience and care than turfing. So, before you jump to the next step, carefully consider whether you wouldn’t prefer the instant gratification of lawn turf.
Still sure? Brilliant—grab your shopping bag, because there are a few bits and bobs you’ll need to get started (I’ve linked to my favourites):
Equipment for growing a lawn from seed
- Spade
- Weed killer
- Power rotavator
- Well-rotted manure, compost, and topsoil
- General-purpose fertiliser
- A lawn roller
- Watering can or sprinkler
- Measuring tape or ruler
- A rake
- and, of course, garden seeds…but more on that next.
Settle on a seed mix
There are tons of different grass seeds available, each with unique characteristics and ideal growing conditions.
For an average family lawn, a blend of durable ryegrass, fescue (with a smooth texture), and self-repairing meadow grass is a safe bet. This blend provides a hardy and low-maintenance lawn that can withstand heavy foot traffic. It tends to recover quickly from damage.
If your garden is shady, sunny, wet or dry, it’s important to choose a grass seed that is suitable for those conditions. For example, shade-tolerant grass seed varieties like fine fescue or creeping red fescue are ideal for lawns that receive less than four hours of direct sunlight per day. Similarly, drought-tolerant varieties like buffalo or bluegrass are ideal for lawns in dry regions.
A word of warning: avoid low-cost blends, they often contain coarse agricultural ryegrass, which isn’t suitable for lawns. Only fine or turf ryegrass is good enough. When in doubt, consult with a local garden centre or seed supplier to determine the best seed for your specific lawn conditions.
Here are some seed options I tend to fall back on when starting afresh:
- Hard-wearing lawn seed: Perfect for children and pets, containing lots of perennial ryegrass.
- General-purpose lawn seed: Also great for families and entertaining, containing a high percentage of perennial ryegrass blended with finer grasses, including tall and red fescues.
- Ornamental lawn seed: A slow-growing grass for a perfectly manicured look, containing the finest fescue and bentgrass blend.
- Shady grass seed: As you might have guessed, this is for shady gardens, containing a mixture of dwarf ryegrass, small meadowgrass, hard fescues and fine fescues.
How much seed do I need?
Here’s a handy calculator that shows you how much seed you need to buy when sowing a new lawn. Just remember this is an estimate, and will vary depending on several factors, such as the seed type, the soil quality, weather conditions, and more. You can use it as a rough guide, though.
Garden Lawn Seed Calculator
Choose the right time
Timing is key when it comes to growing a lawn from seed. Mid-spring and early autumn are the best seasons to seed a lawn, thanks to plenty of moisture and moderate temperatures. During this time, soil is warm enough for the seeds to germinate, but not too hot that the seed will dry out, allowing them to sprout before winter comes.
If you’re seeding in the autumn, be sure to sow the seeds at least ten days before any frost is due. This will give the roots time to establish themselves before winter comes. Keep in mind that seeding in late autumn may not be suitable for some types of grass seed, so it’s best to consult the packaging information.
I would personally avoid sowing seeds in the summer months, as dry conditions can make it difficult for the seed to germinate and grow.
Clear the area

Creating a flawless lawn starts with purging the area of vegetation, stones, and debris. So, it’s time to grab a few tools from our earlier shopping list.
The first step is to use a sharp spade and a keen eye to remove every trace of old grass or other plants, such as bindweed, daisies, and buttercups. You’ll want to ensure the new grass seed has a clear and ready surface to grow on. For large turfed areas, you can use a turf cutter to make the job easier.
When it comes to weed control, I recommend using a herbicide that acts on the weeds without sticking around. Avoid the residual type that stays in the soil, as that will stop the new grass in its tracks. It’s essential to read the instructions and follow them carefully, as over-application or misuse of herbicides can damage the soil and harm other plants and animals.
Rotate the Soil
Next, prepare the soil for growth using a process called rotavating. This involves breaking up compacted soil to encourage better water and nutrient penetration. The goal is to create a loose and fertile environment for the grass seed to grow.
A power rotavator is the best tool for the job, and it should be used to clear and turn over the soil to a depth of around 25 centimetres. One of my favourites is this 1500w model from Stream, but the eSkden cordless rotavator is a bargain at under a hundred quid.
Here’s how to rotavate your soil:
- Read the tool instruction manual
- Start up the machine
- Work lengthways to create natural channels
- Repeat until the soil is fine and loose
- Let the ground soil settle before sewing seeds
A quick tip: if you’re working with clay soil, I recommend watering it 3 or 4 days before rotavating to avoid clumping. The same goes for compacted soil, especially if it was once under a patio.
Improve soil structure
In addition to rotavating, you’ll want to add well-rotted manure, compost, and topsoil to improve its fertility and structure. This organic matter helps to improve the soil’s water retention and aeration properties, encouraging healthy root development.
It’s also worth noting that if the soil is sandy, it’s important to add more organic matter to improve its fertility and structure. I’d recommend leaving the enriched soil to settle for at least a few days, or better still, a few weeks to ensure the soil reaches its optimal condition for grass growth.
Compact the soil
First, re-weed the area to clear any unwelcome plants that may have taken hold while the soil was settling. Next, use a lawn roller to compact the soil, ensuring that it’s level and firm. This will help to prevent soil erosion and create a smooth surface for the new grass to grow.
Once the soil is level and compacted, add some fertiliser to provide the necessary nutrients for the grass seed to germinate and grow. If using a general-purpose fertiliser, I aim for approximately 70 grams per square metre.
Finally, rake the soil repeatedly in different directions to create a fine tilth—the perfect conditions for grass growth. It will ensure that the seed is evenly distributed and soil is smooth enough for planting.
Sow the Seed
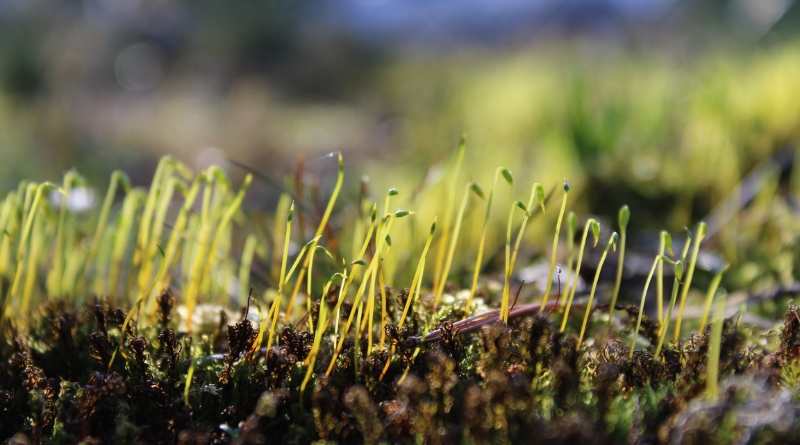
You’re nearly there! The key to successful sowing is to spread the seed as evenly as possible. Remember that each seed becomes a separate plant, so they need some growing room.
It’s recommended to aim for 25-to-30 grams of seed per square metre, but this will depend on your blend so read the box instructions. When seeding a large area, it’s best to divide it into square metre sections. Split the seed quantity in half and spread that portion over the whole area, working in parallel rows lengthways. Then repeat the process with the other half, working in the opposite direction.
Once the seed is sown, water the area thoroughly until it’s soaked. You’ll want to ensure that the seed makes good contact with the soil and starts to germinate. At this point, you should leave the seed to rest for several weeks and avoid walking across the soil — even if it is tempting to see how things are progressing. I recommend protecting the new grass seed from birds by covering the area with a light layer of straw or mulch.