We independently research, review, and recommend the best products. If you buy something through our links, we may earn a commission. Learn more.
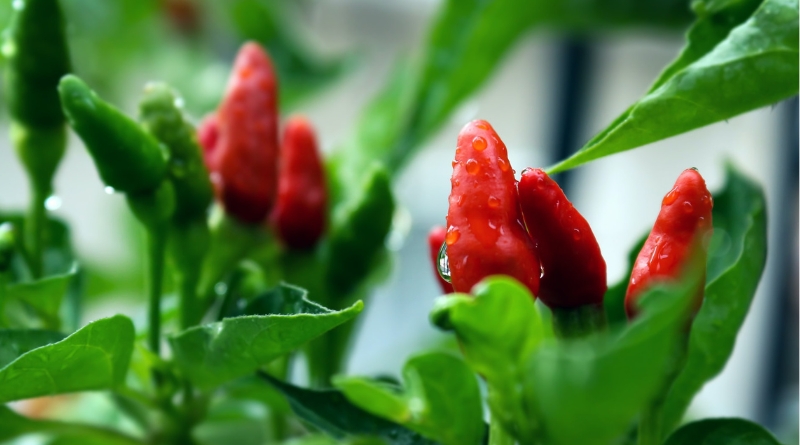
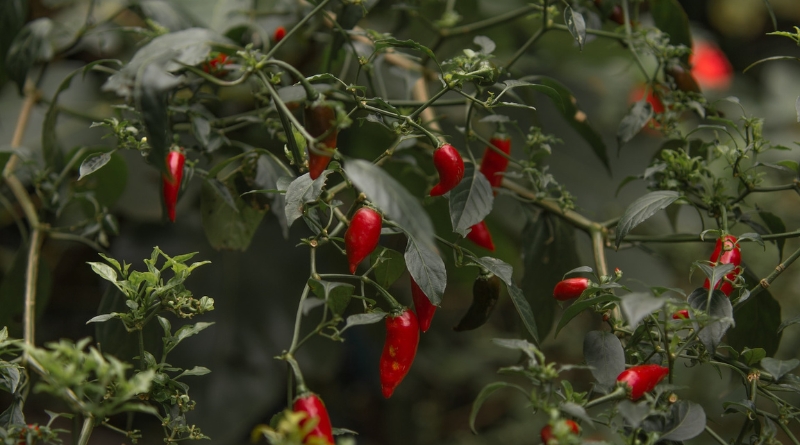
Want to spice up your life? Try growing your own chillies!
It may seem like a daunting task, but with the right variety, preparation, and care, you can enjoy a bountiful harvest of spicy, flavourful chillies in your garden. In this guide, we’ll cover everything you need to know to successfully grow chillies in the UK, from choosing the right variety to harvesting and storing your crop, including tips and tricks to maximise your yield.
Contents
Recommended chilli varieties for the U.K. climate
When it comes to choosing the right chilli variety to grow in the UK, there are a few key factors to consider—one being heat. The heat level of a chilli is determined by the alkaloid capsaicin, which is measured in Scoville Heat Units. Mild varieties, such as the “Apricot” habanero, have around 6000 units, while hot chillies, like the “Trinity” Scotch-bonnet habanero, can have as many as 200,000 units. So, you’ll first want to whittle down your list by determining what type of heat you can handle and enjoy.
Next, you should consider the growing difficulty of the variety. Naturally, some chillies are easy to grow, while others are a little more demanding. A good starting point is the “Alma Paprika” Hungarian heirloom, which is sweet and mild, but with a hint of black pepper, and easy to grow. Fancy upping the heat? The “Jamaican Hot” Caribbean chilli is a little more demanding and requires more space due to its tall plants. Choose a variety that matches your heat preference and gardening capabilities.
10 chillies you can grow in the U.K:
- Alma Paprika – A sweet and mild variety with a hint of black pepper, perfect for drying and making paprika.
- Erotico – Cold-tolerant baccatum type with a tangy, apple-like flavour.
- Hungarian Black – A unique variety with beautiful purple flowers and richly flavoured fruits that ripen from red wine to black.
- Aji Wrecking Ball – A nutty, savoury variety that bears many crunchy, fleshy fruits.
- Thai Dragon – A small, ornamental variety with fiery green fruits that ripen to red.
- Jamaican Hot – A fierce Caribbean variety with thin-skinned fruits that have a dry, spicy flavour.
- Yellow Scorpion – A sweeter and less hot version of the Scorpion chilli, but still packs a punch.
- Zimbabwe Bird – A large-fruited variety with a high heat level and a fruity flavour.
- Padrón – A classic tapas chilli that starts off mild and matures to become lively.
- Trinity – A bright-red, flavourful, and productive Scotch bonnet habanero.
Location, Location, Location

Chillis need a sunny spot with a minimum temperature of at least 20 degrees Celsius, so a greenhouse or sunny windowsill is ideal. If you live in the south of the UK, you may be able to grow chillies outdoors, but be prepared to provide some shielding from the elements, such as shading or frost protection. A warm conservatory is a great alternative—just remember to keep it well-ventilated.
When your chillis have about 5 pairs of leaves, they should be potted-on into larger pots, ideally 9 to 12 inches, depending on the variety. It’s important to keep in mind that as the summer sun intensifies, some shade may be necessary to prevent blossom-drop and pod-drop. Larger varieties may need support with a cane.
Preparing the soil
Preparing soil is an essential step in growing chillies in the UK. The ideal soil for chillies should be well-draining, rich in organic matter, and have a pH level between 6 and 7. A soil-based compost, such as John Innes loam-based seed compost, is recommended for germination. It is also important to ensure that the soil isn’t compacted and has decent air circulation.
To prepare the soil, remove any debris or weeds, and add organic matter to your compost, like well-rotted manure or aged animal manure. These organic materials will improve the fertility of the soil and provide essential nutrients for the growth of your chilli plants. We recommend using a balanced fertiliser such as a 10-10-10, which provides chillis with the necessary nitrogen, phosphorus and potassium.
It is also important to consider drainage, as chillies don’t tolerate waterlogged soil and may rot if it’s too wet. If your soil has poor drainage, you can improve it by incorporating coarse materials, such as sand, perlite, or vermiculite. Maintain soil health throughout the growing season by regularly incorporating organic matter, and by mulching around the base of the plants. Mulch will help to retain moisture in the soil and suppress weed growth, which can compete with your chilli plants for nutrients.
Sowing seeds

In the UK, chilli seeds need to be sown early in late winter or early spring, as soon as the risk of frost has passed. This will give your plants the longest possible growing season, ensuring that the fruits have enough time to ripen properly.
You should grow your chillies in a greenhouse or poly-tunnel, although they can be grown outside in a sunny spot during the height of summer.
I recommended sowing seeds during February and March, keeping in mind that the number of days taken for a particular variety to reach maturity can vary greatly. Habanero varieties, for example, can take 100 or more days from potting on to reach maturity, so they need to be started in good time. Adding warmth to the seed compost and using surface watering with a spray bottle can improve germination speed and percentage.
A step-by-step to planting chillis:
- Prepare the soil by ensuring that it has the right pH level, drainage, and fertility. You can amend the soil with compost or other organic matter to improve its quality.
- Choose a sunny spot for planting your chillies. They need at least six hours of direct sunlight per day to thrive.
- If you are planting from seed, start them indoors 6-8 weeks before the last frost date in your area. If you are planting seedlings, wait until all danger of frost has passed.
- Plant your chillies in well-draining soil, at a depth of about 2-3 inches. Space them about 18-24 inches apart, depending on the variety.
- Water your chillies thoroughly after planting, and then keep the soil consistently moist but not waterlogged.
- Apply a balanced fertiliser to the soil around your chillies, following the manufacturer’s instructions.
- Provide support for tall varieties, using stakes or cages as needed.
That brings us nicely to maintenance and pest control…
Chilli plant pest control
Chillies are susceptible to a range of problems, including aphids, whitefly, and powdery mildew. Regular monitoring and appropriate treatment will help to keep these issues under control.
Here are a few top tips:
- Peat, compost, and manure help to control nematodes on your chilli plants when mixed into the soil.
- To remove aphids and spider mites, try spraying the chilli plant with insecticidal soap made from potassium fatty acids.
- Try dislodging insects from the plants by spraying it with a garden hose.
- You can eliminate aphids by introducing predators, such as hover fly larvae, lady beetles, and lacewing larvae.
- Eradicate slugs by spreading diatomaceous earth on the ground around the plant. You might need to reapply after heavy rain.
Another key consideration when it comes to caring is pruning. By removing the tips of the branches, you can encourage bushier growth and a larger yield. You should also remove any yellowing or dying leaves to help the plant focus its energy on healthy growth.
Optimising light exposure
If you want to achieve a bountiful harvest of chillies, I recommend making a few tweaks to your light exposure. Here are a few techniques to ensure your plants receive the right amount of light:
- Place your chilli plants in a sunny location that receives at least 6 hours of direct sunlight per day.
- If you are growing chillies indoors, make sure to provide them with a grow light or place them near a sunny window.
- Rotate your chilli plants regularly to ensure all sides receive an equal amount of light—this will help prevent the plants from leaning towards the light source and becoming lopsided.
- Provide additional lighting during the winter months when daylight hours are shorter.
- Consider supplementing natural light with artificial lightings like LED or fluorescent grow lights.
- Make sure to keep the chilli plants clean from dust and grime as this can block light from reaching them.
- Try using reflective surfaces like aluminium foil or white paint to maximise the amount of light that reaches the plants.
How to propagate your chilli plants
Propagating chilli plants is a great way to expand your collection and increase your yield, without having to purchase new seedlings each year. With the right tools and techniques, you can easily propagate new plants from your existing stock.
Here are some steps to help you propagate chilli plants:
- Choose a healthy and mature parent plant. Look for a plant that is at least a year old, with a sturdy stem and plenty of leaves.
- Take stem cuttings in the spring or early summer when the plant is actively growing. Use a sharp, clean pair of scissors or pruning shears to take 4-6 inch stem cuttings from the parent plant.
- Remove the leaves from the bottom 2 inches of the stem cutting, leaving just 2-3 leaves at the top of the stem.
- Dip the cut end of the stem cutting into rooting hormone powder to promote root growth.
- Plant the stem cutting in a small pot filled with seed compost or a mixture of seed compost and sand. The pot should be deep enough to bury the cutting up to the leaves.
- Keep the cutting warm and moist. Cover the pot with a plastic bag or propagator lid to create a humid environment.
- Keep the cutting in a bright, but not direct sunlight place. Keep the temperature around 21C.
- Wait for roots to appear. This can take anywhere from a few days to a few weeks, depending on the variety of chilli you are propagating.
- Once the roots have appeared, you can remove the plastic bag or propagator lid and begin to care for the new plant as you would any other chilli plant.
- Remember to keep the soil moist but not waterlogged, and place it in a warm place out of direct sunlight until it is established.
It is important to note that not all chilli varieties will root easily. But with the right care and attention, your propagated chillies will be producing fruit in no time.